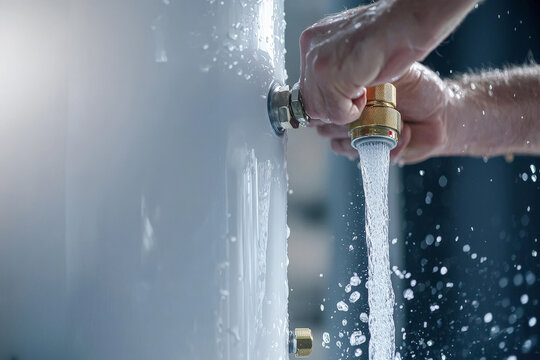
Flushing a water heater simply means draining the tank completely to clear out the mineral sediment that settles at the bottom over time, and it is one of the most important maintenance tasks a San Diego homeowner can perform to keep hot water flowing consistently.
Because San Diego’s municipal water supply carries a naturally high mineral content, tanks here collect sediment faster than in many other regions, which makes regular flushing a routine part of owning a home in this area.
As experienced plumbers in San Diego CA, we put together this detailed, technical walkthrough so homeowners understand exactly what causes this buildup and how to remove it safely, step by step.
Why San Diego Water Causes Faster Sediment Buildup
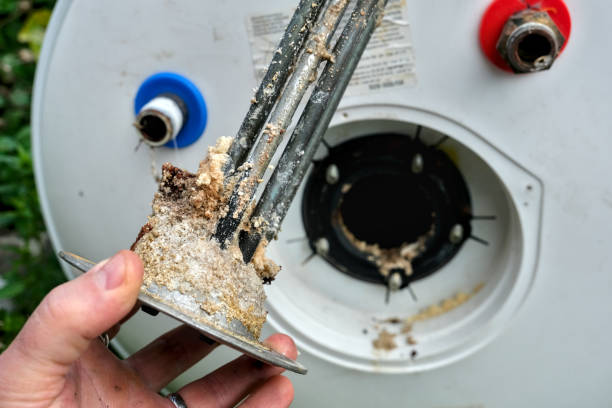
San Diego sits on one of the hardest water supplies in Southern California. The water delivered to most neighborhoods carries elevated levels of calcium and magnesium, along with trace minerals drawn from the Colorado River Aqueduct and local groundwater sources.
When this water is heated inside a tank, those minerals separate from the liquid and settle at the bottom as a fine, chalky layer.
Over months, this layer compacts into a denser crust. A tank that holds even a quarter inch of this buildup loses noticeable heating efficiency, since the sediment acts as an insulating barrier between the burner or heating element and the water above it.
In hard water regions like ours, this process moves along faster than the national average, which is exactly why local flushing schedules differ from what manufacturers list in a generic owner’s manual.
Signs Your Water Heater Needs a Sediment Flush
Before jumping into the process, it helps to confirm the tank actually needs attention. Watch for these indicators:
- Popping, rumbling, or cracking sounds coming from the tank, caused by water trapped underneath a layer of hardened sediment.
- Hot water that takes longer than usual to reach the tap.
- Inconsistent water temperature during a shower or while running appliances.
- Reduced hot water volume compared to what the tank normally provides.
- Slightly discolored or cloudy water coming from the hot tap.
- Higher energy bills without a clear explanation.
Any one of these on its own is worth monitoring, and a combination of two or more is a strong signal the tank is due for a flush.
Tools and Materials You Will Need
Gathering everything beforehand makes the process smoother and keeps the job contained to one or two hours.
- A standard garden hose long enough to reach a floor drain, exterior door, or large drainage bucket.
- A flathead screwdriver or valve key for the drain valve.
- Work gloves to protect against hot surfaces.
- A bucket for catching any residual water.
- A flashlight to inspect the tank interior once drained.
- Adjustable pliers if the drain valve is stiff from mineral scale.
Step by Step Instructions to Flush a Tank Water Heater

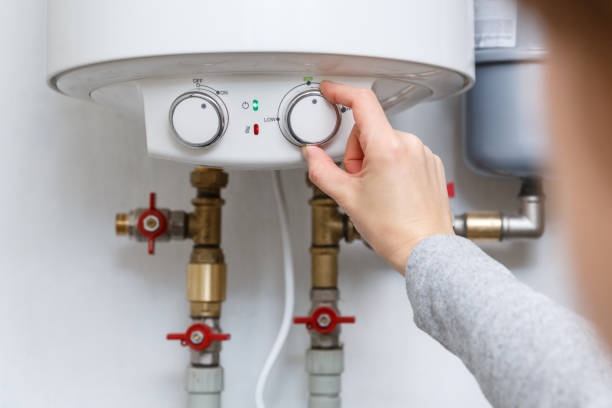
Step 1: Turn Off the Power or Gas Supply
For an electric unit, switch off the corresponding circuit breaker in your electrical panel. For a gas unit, turn the control knob to the pilot setting.
This protects the heating element or burner assembly from operating while the tank is empty, which can cause serious internal damage in a matter of minutes.
Step 2: Shut Off the Cold Water Supply Valve
Locate the cold water inlet valve at the top of the tank and turn it clockwise until it is fully closed. This stops new water from entering the tank while you drain it.
Step 3: Let the Water Cool Slightly
Give the tank fifteen to twenty minutes before draining if it was recently used. Water straight from a heated tank can reach temperatures well above what is comfortable to handle near an open hose.
Step 4: Connect the Garden Hose
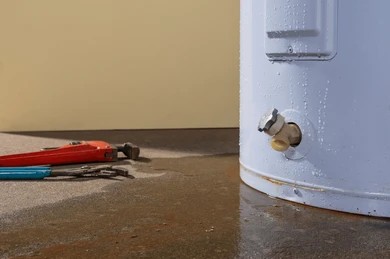
Attach the hose securely to the drain valve near the base of the tank and run the other end to a floor drain, sump pump basin, or outside area with proper drainage. Make sure the hose sits lower than the tank so gravity assists the flow.
Step 5: Open a Hot Water Faucet Inside the Home
Turning on a hot water tap somewhere in the house breaks the vacuum seal inside the tank and allows air to enter, which speeds up the draining process considerably.
Step 6: Open the Drain Valve
Using your screwdriver or valve key, open the drain valve slowly and let the tank empty completely. This is the core action in the entire process, since it physically carries dissolved and settled sediment out of the tank along with the water.
Step 7: Flush With the Cold Water Valve
Once the tank is empty, briefly open the cold water supply valve for thirty to sixty seconds while keeping the drain valve open. This sends a fresh burst of water through the tank and stirs up any remaining particles at the bottom, pushing them out through the hose. Repeat this two or three times, checking the water clarity each time.
Step 8: Check the Water Runs Clear
Continue the rinse cycle until the water exiting the hose runs clean and free of visible particles. In homes that have gone several years without a flush, this may take a few extra rounds.
Step 9: Close Everything and Refill the Tank
Close the drain valve, disconnect the hose, and open the cold water inlet valve fully to let the tank refill. Keep the hot water faucet inside the home open while it fills, since this lets trapped air escape.
Step 10: Restore Power or Relight the Pilot
Once water flows steadily and evenly from the open faucet, close it. Turn the circuit breaker back on for electric units, or relight the pilot for gas units following the manufacturer’s instructions printed on the tank.
Step 11: Inspect for Leaks
Walk around the base of the unit and check every connection point, including the drain valve, for any sign of moisture. A dry, secure setup means the job is complete.
Flushing a Tankless Water Heater Is a Different Process
Tankless units do not collect sediment at the bottom the way a tank style heater does, but mineral scale can still build up along the internal heat exchanger, especially with San Diego’s water hardness.
Tankless flushing typically involves isolating the unit with service valves and circulating a descaling solution through the system for around forty five minutes using a small pump.
This process is more technical than a standard tank flush and generally benefits from professional handling to avoid affecting the warranty.
How Often Should San Diego Homeowners Flush Their Water Heater
Manufacturers commonly suggest an annual flush, but that guidance is written for average water conditions across the country.
Given the water hardness levels found throughout San Diego County, many local homes benefit from flushing every six to nine months, particularly in neighborhoods known for especially hard water.
A simple way to judge your own schedule is to track how quickly sediment reappears after each flush and adjust the frequency accordingly.
Common Mistakes to Avoid During the Process
- Skipping the step of shutting off power or gas before draining, which can burn out an electric element or overheat a gas burner.
- Draining a fully heated tank without letting it cool, risking burns from the hose or fittings.
- Forcing open a corroded or stuck drain valve without the right tool, which can crack the fitting.
- Refilling the tank before fully closing the drain valve, causing water to spray from the connection.
- Restoring power before the tank is completely full, which can damage an electric heating element left exposed to air.
When to Call a Professional Plumber
A straightforward flush is manageable for many homeowners, but certain situations call for a licensed technician.
If the drain valve is corroded shut, if the tank has never been flushed in more than five years and shows heavy buildup, if you notice rust colored water even after multiple flush cycles, or if the unit is a tankless system requiring a full descaling circulation, it is worth bringing in a professional.
As experienced plumbers in San Diego CA, we regularly inspect tanks that have gone untouched for years and can identify wear that goes beyond a routine flush, such as anode rod corrosion or early tank fatigue.
Related: What to Do When Your Water Pressure Suddenly Drops to a Trickle
Frequently Asked Questions
How do I know if my water heater has sediment buildup?
Rumbling or popping noises during heating cycles, slower hot water delivery, and fluctuating water temperature are the clearest signs of sediment collecting inside the tank.
Is San Diego water considered hard water?
Yes. San Diego County’s municipal water supply is classified as hard to very hard depending on the neighborhood, largely due to mineral content drawn from imported Colorado River water.
Can too much sediment damage a water heater permanently?
Extended buildup can shorten the lifespan of the tank, reduce heating efficiency, and in some cases contribute to premature tank failure if left unaddressed for many years.
Does flushing a water heater lower energy bills?
Removing sediment restores direct contact between the heating element or burner and the water, which typically improves heating efficiency and can reduce the energy needed to reach the set temperature.
How long does a water heater flush take?
Most residential tanks take between forty five minutes and an hour and a half from start to finish, depending on tank size and how much sediment has accumulated.
Do tankless water heaters need the same kind of flush?
No. Tankless units require a descaling flush using a circulation pump rather than a simple drain and refill, since sediment does not collect at the bottom the way it does in a tank.
Final Thoughts
Understanding how sediment forms and how to clear it out gives San Diego homeowners a real advantage in extending the life of their water heater and keeping utility costs predictable.
The process itself is methodical rather than complicated, and following each step in order is what makes the difference between a quick maintenance task and a much larger repair down the road.
Whether you choose to flush the tank yourself or bring in a professional, staying consistent with the schedule that fits San Diego’s water conditions is the real key to long term performance.